Anniversary Headlight Mod for the Bora
This guide is a mod that has been done by a handful of people. I saw it done on the Golf and didn't think it was fair that there wasn't a guide for the Bora, so, I bought some paint and got going taking plenty of pics along the way.
I hope this guide is useful to lots of people!
Click here to jump straight to separating the headlights, or continue to read through the full process including taking the bumper and lights off.
Tools
Torx - T10, T20, T30
Needle nose pliers
A wide chisel
Stanley knife
A tube of SIKAFLEX* (or windscreen sealant)
Plus your paints and sandpaper.
*SIKAFLEX can be bought in black, which means that it's not going to stand out, very OEM. Can be bought on eBay for under £10 inc. postage.
Click any of the the images for a larger view
So, first of all, some pics of the standard light units. Nothing drastically wrong with them, but they're nothing special... let's change that shall we?


So, lets get them out and modified shall we? First of all, 'pop the hood'... or open the bonnet if you're normal.

The standard grille is just held in with clips, at the top on each side you need to get your finger in behind it and just pull it up and forward to unclip it, then you need to pull it vertically up to pull out two little clips that poke down into the top of the bumper. Same for both sides.

Now for the centre clip, this is just a case of putting something blunt into the square hole at the top, pushing down relatively hard while pulling the grille towards you.

The next bit is described as being the most difficult, but it was easy for me as I've had the grille off before and I replaced it with a clip that holds body shells on R/C cars. However, to get the OEM clip off that holds the bonnet release handle on requires some needle nose pliers and quite a lot of bending plastic (it's quite flexible though). The main problem with getting this little pin/clip thing out is that it's quite easy to loose (i lost mine, but luckily it turned up when I took my bumper off after several weeks, it must've found a nice little home on the inside of my bumper!).
So, all you've got to do is bend each of those plastic 'legs' that are on either side of the metal arm out, and pull them off of the little pin that goes between them and through the metal arm.

Then you just pull the grille vertically up and out (some clips at the bottom), quite easy to get out so don't use too much force. Should pop out quite nicely.
And you should be left with you're grille out and on the floor... or maybe not. Try somewhere that it won't get stood on!

Grilleless! Bumper next...

The bumper is a doddle to take off. There is a guide for taking the bumper off but while I was at it I thought I'd cover it as well.
So firstly you need to undo these three screws along where the grille sat. These are T30 Torx screws.

And there's a T30 Torx at the top of the bumper between where the grille sat and the headlight (one each side)

And there is one on either side behind the lower side grilles. These grilles come out by pushing down on little tabs and just pulling them out. If you're unsure it tells you how to get it out with diagrams in the handbook; you'll find it in the towing section because the screw hole for you from towing eye is behind the offside grille. Once they're off you can see where the screw is, it's the big dirty one to the top right in the picture below (the offside is shown below, the nearside is a reverse of this; it'll be on the left), these are T30s again.

While you're in the nearside lower grille, you need to disconnect the outside temp sensor from the bumper. It's shown in the picture below. The metal clip that holds it on has curved ends at the bottom. I've found the easiest way is to use your needle nose pliers on those bits and move each side up a centimetre or two at a time (alternating sides) and it'll come off a charm.

Now there are only 8 more screws left before the bumper can come off, these are all T20 Torx' and they are inside the front of the arches. They're just holding the arch liner into the ends of the bumper. I've tried to take pictures of them but they're easy enough to see when you do it, just four screws going up from the bottom. You'll need to turn you wheels to full lock to get at them, but you can get by with leaving it on one lock to do both sides (makes it easier if you change the direction for each side, i.e. full lock left to do the offside, and full lock right to do the nearside).


And once you've done that, you can slide the bumper horizontally forward keeping it level and straight. If you have someone hanging around, get a side each as they sometimes need a little thump forward from the wheel arch, but it's quite possible to get off by yourself (and on again, but it's harder as you have to line both sides up).

And find somewhere suitable to leave your bumper, like a stack of wheels...

Now to get those lights off. Each light is held on with four T20 Torx screws, two at the top (vertical) and two underneath (horizontal). Below is two pictures of the top ones and one of the bottom ones (all of the offside light).


After disconnecting the plug at the back, you can take them out, et voilà!
(the plugs have a little tab on then, if you just put your thumb on this while trying to pull the plug apart, then natural force that you'll put on the tab will release it. DON'T USE ANY TOOLS to try and force the tab, you'll break it like I did once before (twice actually, once on one of my headlights and once on a wiper mech... I've learnt now))


Both off:

And out:

I put the bonnet back down as she would be like this for two nights.

I connected the bonnet release handle back on because the clip I was using was a lot easier than the OEM one, you might want to bend one section of a paper clip straight, put it through, then bend it back round again. I think you could reach the metal arm without the grille there so it might not be necessary to put the handle back on, but if you shut your bonnet and can't get it open again without the handle then it's your own fault!

Separating the Headlights
Ok, now for the... err.... fun bit!

A member of the forum has done this a slightly different way, this is how he did:
[quote user="VR6Rich" forum="uk-mkivs.net"]
Just set the oven as low as possible (160 degrees [that's Gas Mark 3 to me]) and when warmed up put the light in there for no longer than 1 minute.
Then you can take it out (with a towel or something as ...[it] will be hot!) and gradually work your way around the lense with a paint scraper, dont use a chisel like you [that's me] did as that will cause too much damage [although you can't see the damage when fitted]. The lense will eventually start coming away from the housing at which point you should be able to get your fingers in to prise it apart.
Leave the sealant in there as you can reuse it when you put it back together. To put it back together just put the lense back on as tight as you can and put the metal clips back on. Then put it back in the oven as before and take it out and press the lense/housing together and allow it too cool down.
So that's his way of doing it, which I haven't tried but it sounds quite easy. I will be taking my lenses apart again in the future so will see how that goes using that method.
Now I'll continue with my original guide, and I'll let you make up your own mind.
First of all, remove the metal clips that help hold the two halves together

The easiest way that I found to get the headlights apart was to basically ram a chisel in between the lens and the projection unit.
Here's a diagram I made to try and explain it (this would be looking through a cross section in case it's not obvious)


In this picture you can see the glue being stretched with the chisel between the lens and the headlight.


And when you have enough space to get your fingers in, get them in there and slowly prise it apart while cutting along the stretched glue with the knife.

When you get to the final edge, pull it open and cut along the inside of where it's joined (because that's the part that will be stretched), no pic for that part though.
And there we go, two separate parts! Yay!!!

As you will see, the silver part that will be sprayed is screwed to the lens. This is held to the lens with 4 T10 Torx screws.

First of all, remove the little light reflector that catches any light trying to escape (you'll want to keep this bit silver). It's just 2 T10 Torx'.
Now to get the main bit off, the remaining 2 here...

And another 2 here...

TA DAA. Now, go forth and spray!

There is a little lip behind the main silver section at the bottom which will help stop any light being wasted and going into the back of the headlight, so I masked over this part to keep it silver; you can't see this with the headlight assembled so it doesn't matter. I assume that it'll just help with light reflection.
Here's some pics of the damage that I did to my first headlight when I didn't really know how to best take them apart, I was basically attacking it with a sharp flat blade screw driver and trying to get the glue out. But if you use the method I described you should only have one side bent out a bit. They are quite flexible though and will bend back to pretty much where they were. The only side you don't want to damage is the top because that can be seen with the bonnet up.


Anyway, you should have your chrome parts sprayed now:

Now you just need to screw the newly sprayed sections back to the lens, an screw the little reflector back on. Looking good eh?


And placed against the headlight:


Now to get them glued back together; there aren't any pictures for this I'm afraid. However, it's simple enough.
Lay a line of SIKAFLEX (I did about 2mm wide) around the full circumference of the headlight, then just place the lens in and hold it firmly in place while you clip the metal clips back in place; these will hold the two parts together while the sealant drys.
I then left them on a table near a radiator overnight and fitted them the next day. Ideally it needs nearer 2 or 3 days to fully cure but because the clips are holding the two parts together I didn't wait.
And with them glued (you can tell I was chuffed as there are plenty of pics!)


Right then, refitting! This is an exact reversal of removal.
Plug each light in and there's two screws at the top, and two at the bottom of each light (all four are T20)

Then, line up and slide the bumper on straight. It usually takes a little thump to seat it in place.
There's the 4 T20 screws inside the arch liners on each side.
Now for the T30s, two at the top of the bumper just inside of each headlight,
Three along underneath where the grille goes,
One behind where each of the lower side grilles go.
Now the grille just clips in place, first at the bottom, then on either side at the top, making sure to push the little clips in their slots underneath. Then a final clip in the middle.
The bonnet pull handle then just clips on with the little pin. This is just a case of trying and trying, you'll get it in there
Finally clip the lower side grilles in and you're done!
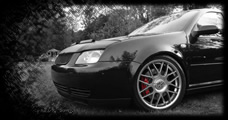
Now sit back, and enjoy the look of your subtly tinted headlights. They look better from a little distance


Created: 30th Apr 2008
Updated: 14th Jan 2010
 Loading Images...