Colour Code your Boras Rear Badge
Here is a write up that I have created with the much appreciated help of Patch, it started off with me reading a thread about people spraying the badges backing on the Golf so that it just looks like the silver bit is stuck to the bodywork, and I wondered how hard it would be to do with the Bora given that the lock is integrated into the badge, a couple of days later I have a result! Patch started ripping appart a Bora in a scrap yard to give me the idea or how it came appart and I did the mod and went into more detail.
Now every Bora owner can enjoy the subtle but effective mod!
Click any of the images to see a larger view
Here is the badge to begin with:


But I wanted to copy the Golf guys and paint the backing of the back VW badge so that it blends into the paint.
So heres a little guide that I created with the help of Patch so that the Bora boys arent left behind by the Golf guys.
To start off with you need to remove the interior trim panel on the boot. This is just held in by 13(?) screws around the outside and two that are visible when the warning triangle is removed and the clip is left open.

Once that is removed you need to disconnect the parts that the lock is connected to, these comprise of a ball joint and an electrical connection. The ball joint is quite stiff so I found using a flat head screw driver to price it out is the best way, and the connection has a clip that you pull and then it just slides out.
Wiring Connection:

Ball Joint:

Image courtesy of Patch
Now the lock and badge are ready to be removed, to release it you need to undo the three size 25 torx screws (two of them can be seen in the picture above).
Then its just a case of pushing it from inside and pulling around the badge from the outside. There is nothing else holding it in but I found on mine the rubber around the inside of the badge had stuck to the paintwork where it had been there a long time.
NOTE: Now that you have disconnected the connection from the lock the boot will not open, I had to put the back seats down and crawl to the boot open it again, this is done by pulling the rod nearest the bottom upwards.
Once the lock and badge are out of the car its time to dismantle it.
Screws holding badge on

The badge is held to the lock with two Phillips screws and some foam tape, the screws can now be taken out and the rubber (the part that sat against the paintwork) can stay where it is or be removed if it makes taking the badge off easier (I did). This is just held on with a small amount of glue and should prise off quite easily, use a flat head screwdriver or quite a blunt knife to prise it away from the metal of the lock if it wont peel off.
Once the two Philips screws are undone the badge needs to be prised from the lock, I found that its best to leave the glue on the lock side so that the badge is free of any of it.

After taking a knife all around the circumference of the badge between it and the glue (this step may not be necessary, but it will help), I pushed the knife in all the way (only a 3 blade) and pulled it far enough apart so that I could get my fingers in, then just pulled it apart; it comes away quite easily once you get started.

Now the lock is separate from the badge, you need to get the two sections apart. They are held together by six plastic rivets:

I drilled them out with a hand drill and a ø5mm bit (which is the same thickness as the white plastic part). Once they are drilled out I slid a knife between the silver VW part and the black backing part so separate them.

Now the back part is separate and ready to begin preparation and spraying:

The plastic lock cover needed to come off as well, this was guesswork as to how it came off but now you know. First of all you need to remove the rubber surround which just slides of.
The cover is held in place with two clips; the cover has a slot on each side and the lock barrel has a protrusion that clips into the slot. These are located on both sides i.e. left and right as it is in its rest position. Below is a picture of the lock cover once I had it off.

I just went as this prising it off with a knife as I didnt know how it comes off, now I do I dont know a better way of removing it, but dont worry about the odd scratch up the side as it wont be seen once its back together.
Behind this cover there is the little flap that get pushed when the key is inserted, this will fall out so make sure you dont loose it, there is a spring there as well but that doesnt come out.
The two parts that cover the lock:

The lock without the cover:


Images courtesy for Bora Tee Dee Eye, as mine wern't in focus...
I used a full set of Halfords paint, grey plastic primer, Black Magic Pearlescent paint, and clear lacquer.

And some sand paper, the cans recommend using 600 grade wet & dry sand paper but I just used what I had in the garage.
[quote user="Patch" forum="uk-mkivs.net"]
sand with 240/400/600/800/1200 grit sand paper in that order,that way you will have a smooth surface to start on.
Then prime sand/prime sand with 1200 grit
Two coats of paint should be given a light sand(1200 grit),then the final coat unsanded.
Then its just a matter of getting the lacquer on. The results will be amazing.
[/quote]
Now everything needs to be sanded down and painted which isnt rocket science, Ill cover this part anyway to continue showing what I did.
Here is the badge backing sanded ready to have the first coat of primer:

And once primered:

When I was spraying the little flap I placed a piece of sticky tape (taking care not to use a brand name!) upside down and stuck that down at each end with some more tape; then I stuck the flap to the tape so that it didnt get blown away by the spray or any wind.

NOTE: Make sure that you paint the correct side of the flap; the widest side is on the left.
Getting the paint on now

And finally 2 coats of lacquer to finish it off.
Assembly is the reverse of disassembly as with most things. But there are two things that you cannot do; make the foam pad holding the badge to the lock sticky again, and re create the plastic rivets that were holding the badge to the backing.
To put the two parts of the badge together I used some super glue around the protrusions on the back of the silver part (the parts that had the riveted ends) and pushed them into place through the newly painted backing, once through I added some more super glue around the edge at the tops of them for added hold.
The protrusions to which the super glue was applied

Before the badge can be put together with the lock again the lock cover and associated parts need to be put in place again, this begins with the locks flap. This is simple to put in but harder to keep it in place while putting the cover on top of it. The way I decided to do this is to put it in place, then put a key through the hole in the cover (that the key goes through to get to the lock) then push the key against the flap holding it in the closed position. Then the cover can be pushed down until its clipped in and the key can be removed. In simpler terms:
• Place it into sprung position (holding with finger)
• Put your key through cover
• Push the flap down with the key
• Push cover into place
However, I ended up just balancing the flap in the correct place and pushing the cover over it carefully, then pushed it down until it clipped into place.
The outside edge of this cover was previously covered in grease so its a sensible idea to give it another layer. This is needed because this cover part moves with the lock so it has to be able to slide nicely.
Now the rubber grommet around the lock cover can be replaced and it is now ready to have the badge over the top of it.
DO NOT forget the rubber grommet! Unless you want to take it all appart again once you realise!
Now the badge and lock are ready to be assembled and put onto the boot again.
To attach the badge back onto the lock there are the two screws as mentioned when taking it apart:

I decided to just use these rather than putting some glue onto the foam pad, but first of all I needed to smooth out the pad from when I was pushing the knife in to take it off.
I just used a knife to cut off any large bits of glue that had stuck together so that it sat flatter against the lock part. Then its just a case of putting the rubber flange that sat between the lock face and the bodywork back in place using a few small dabs of superglue so its held as it was before. Then the two screws that hold the badge to the lock can be screwed back in place.
The competed assembly


The whole assembly is ready to be put back onto the boot again, inserting it from the outside, screwing the three torx screws in, connecting the wiring up, clipping the ball joint back on and screwing the interior panel back in.
When clipping the ball joint back in I found that it helps to put a flat head screwdriver behind the arm that it connects to, so that when you are pushing the ball joint cup on you arent pushing against the lock assembly and possibly bending/breaking something.
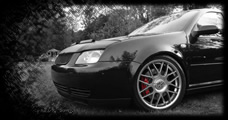
Here is the finished product:


It is not a perfect finish by far, so Ill be doing it again at some point (buy a new badge and start from fresh) but this is how to get it apart, the painting part will be done far better by yourself!
Some more pictures of the finished product; Showing a greater improvement from standard, and a better paint finish!


Courtesy of Bora Tee Dee Eye